English 

Views: 0 Author: Site Editor Publish Time: 2026-05-14 Origin: Site


Transitioning from simple text displays to a custom UI requires a major hardware shift. You must move from basic character displays to highly capable graphic LCDs. This leap introduces new hardware overhead and strict memory management requirements. It also demands rigorous image formatting rules.
Engineering teams frequently encounter frustrating roadblocks during early UI prototyping. They face rendering artifacts, memory overflow crashes, or unacceptably slow refresh rates. Many developers discover too late how standard image formats fail on embedded systems. They realize microcontrollers cannot process common web graphics directly.
This article provides an end-to-end framework for formatting, converting, and rendering custom images. You will learn the exact architectural decisions required for production scaling. We outline how to transition a graphic display prototype into a reliable mass-production unit.
Strict Formatting is Non-Negotiable: Images must typically be strictly mapped to physical pixel dimensions and saved as uncompressed 24-bit BMPs or converted directly to C-language hex arrays.
Tooling Dictates Workflow: Converting graphics requires dedicated GUI tools (like LCD Assistant) for basic setups, or CLI-based automation for multi-frame UI development.
Memory Architecture Drives Hardware Choice: Rendering directly from a microcontroller's flash memory suits static logos, while external SD card loading via SPI/Parallel bus is required for complex, multi-asset interfaces.
Partnering for Scale: Moving from prototype to mass production requires evaluating a Graphic LCD manufacturer based on interface compatibility, custom FPC routing, and controller IC stability.
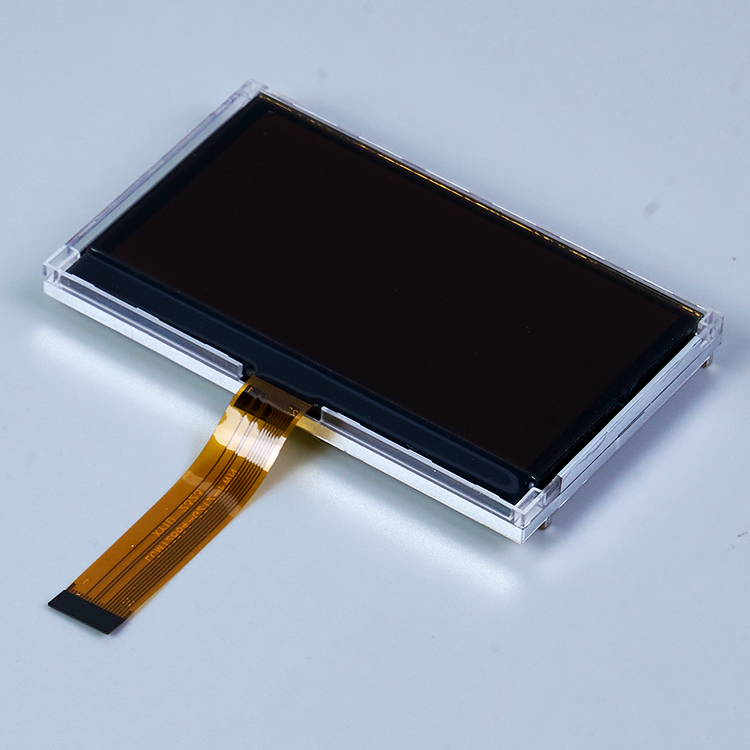
Displaying custom imagery requires establishing solid baseline expectations for your hardware. Character LCDs utilize pre-loaded Read-Only Memory (ROM) to display standardized letters and numbers. This approach requires very minimal processing power. Conversely, a Graphic LCD requires the host controller to draw every single pixel on the screen. This fundamental difference demands significantly higher processing overhead. It also requires precise coordinate mapping from the host microcontroller.
To push image data efficiently, you must evaluate different communication protocols. The trade-offs between interfaces directly impact your image rendering speed and hardware layout.
Interface Type | Data Transfer Speed | Pin Consumption | Best Use Case |
|---|---|---|---|
Parallel (8-bit / 16-bit) | Very High | High (8 to 16+ pins) | Complex color interfaces, high-refresh-rate TFTs. |
SPI (Serial Peripheral Interface) | Moderate to High | Low (3 to 4 pins) | Monochrome displays, static color logos, limited I/O. |
I2C (Inter-Integrated Circuit) | Low | Very Low (2 pins) | Basic text, simple status icons, slow refresh needs. |
You must also maintain strict controller IC awareness. The specific display controller dictates your firmware initialization sequence. For example, the popular ST7920 controller handles monochrome graphic displays using specific command protocols. Color TFTs often use ILI9341 or similar drivers. Each IC requires distinct command and data handling functions in your firmware layer. You cannot blindly send image data without first properly configuring the controller's memory addressing modes.
Proper image preparation prevents most rendering failures. Exact resolution matching serves as your most critical constraint. You must strictly map your image to the physical pixel dimensions of the display. If you use a 144x32 display, you must create an exact 144x32 digital canvas. Scaling images on the microcontroller level wastes critical CPU cycles. Microcontrollers struggle heavily when calculating real-time interpolation algorithms.
Color depth and compression rules dictate how files are saved. Embedded hardware lacks the resources of a modern desktop computer. Consider these specific constraints:
Monochrome constraints: Images must be strictly reduced to pure black-and-white. You cannot use grayscale. You must force a 1-bit depth prior to converting the file into a data array.
Color TFT constraints: External storage loading introduces different rules. Standard rendering libraries generally only support uncompressed 24-bit BMP formats.
Engineers often trigger common failure points during asset creation. Saving files using a 4-bit depth often corrupts the rendering process. Utilizing standard compression formats like PNG or JPEG almost always fails. Most embedded microcontrollers lack a dedicated hardware decoder. Furthermore, they lack the RAM required to run software decoding libraries. Standard libraries simply parse uncompressed raw byte sequences. Any compression scrambles these sequences, resulting in failure-to-render errors or missing file headers.
Microcontrollers cannot typically read desktop file formats directly from internal memory. We must explain the array conversion concept. You must strip all image file headers away. The conversion process transforms raw pixel data into hexadecimal C/C++ arrays. These `.c` and `.h` files embed directly into your compiled firmware.
During the prototyping phase, engineers rely on GUI-based conversion tools. Standard desktop utilities like LCD Assistant or Image2cpp streamline this process. You must carefully manage several critical configuration parameters when using these tools. First, set the correct byte orientation. You must choose between Horizontal and Vertical byte packing based on your specific display controller's memory map. Sending horizontal bytes to a vertically addressed controller produces unreadable static.
Next, you must utilize memory modifiers correctly. In Arduino environments, large image arrays quickly consume dynamic memory. You must use `PROGMEM` modifiers to force the compiler to store the array in flash memory. This crucial step prevents SRAM exhaustion and system crashes.
For production UI development, teams move toward CLI-based automation. Advanced firmware frameworks utilize Command-Line Interface tools. These tools batch-convert graphic assets instantly during the build process.
Export raw design assets into a monitored project directory.
Execute a CLI tool to convert images into optimized C arrays automatically.
Generate specific color-palette flags tailored for the target hardware.
Compile the final firmware bundle seamlessly.
This automated approach streamlines agile UI development. It eliminates tedious manual conversions when managing dozens of graphical menus or animation frames.
Your chosen memory architecture heavily influences your final hardware design. You must choose between onboard flash memory and external storage options.
Onboard flash memory allows for direct array loading. This method compiles the image data directly into the microcontroller's program space. It works best for boot logos, static icons, and simple monochrome user interfaces. Flash memory offers immediate, zero-latency access to image data. However, it suffers from severe limitations. Most basic microcontrollers offer very restricted internal flash storage capacity. A few full-screen bitmap arrays will quickly exhaust available space.
Complex interfaces demand external SD card or flash IC integration. Full-color bitmaps, digital photo frames, and dynamic multi-screen UIs require megabytes of storage. Implementing external storage introduces new design realities. You must format the storage media to specific file systems, typically FAT16 or FAT32. You must also account for system latency. Fetching data over an SPI bus takes time. The processor reads the SD card and then pushes the data to the display. We recommend using Direct Memory Access (DMA) controllers to speed up this dual-bus communication.
Comparison Chart: Storage Architecture Constraints | |||
Storage Method | Typical Capacity | Access Latency | Ideal UI Application |
|---|---|---|---|
Internal MCU Flash | 32KB - 2MB | Zero Latency | Monochrome icons, startup logos. |
External SPI Flash IC | 4MB - 128MB | Low to Moderate | Pre-rendered color animations, fonts. |
Micro SD Card | 1GB - 32GB+ | Moderate (Bus dependent) | Dynamic user photos, heavy bitmaps. |
Smart engineering teams utilize a distinct workflow hack during development. They implement "hot-swappable" SD card firmware setups. The firmware scans the SD card upon boot and loads UI assets dynamically. Designers can rapidly test UI iterations simply by replacing files on the card. This process entirely decouples UI design from time-consuming firmware compilation.
Shifting from a DIY prototype to a rigid Bill of Materials (BOM) changes your priorities. You must abandon standard development boards and prepare for custom PCB integration. Finding the right supply partner becomes your most critical task.
You must evaluate a Graphic LCD manufacturer based on specific customization dimensions. A qualified manufacturer should seamlessly customize their standard products for your production run. Pay close attention to form factor and interconnects. Ask for custom Flexible Printed Circuit (FPC) lengths and specific pinouts. Custom FPCs ensure the display drops perfectly onto your final PCB layout, eliminating unreliable jumper wires.
Next, focus on optical enhancements. You can ask the manufacturer to adjust LED backlight brightness or tweak the color temperature. Industrial applications often benefit from added anti-glare or anti-fingerprint surface treatments. Finally, review specific durability specifications. Outdoor environments demand wide-temperature display fluids. High-traffic consumer devices require robust capacitive touch overlays.
Your evaluation criteria must extend beyond simple hardware specs. You need to assess manufacturer reliability through their controller IC obsolescence management. Displays often face sudden end-of-life notices when ICs become unavailable. A trusted partner will secure long-term IC stock or offer seamless drop-in replacements. You should also verify their minimum order quantities (MOQs) and demand access to dedicated application engineering support.
Displaying custom imagery on a graphic LCD remains a rigorous engineering exercise. It requires strict data formatting, careful memory management, and precise hardware alignment. You cannot simply drag and drop standard desktop images into embedded environments without extensive preparation.
Engineering teams should follow concrete next steps to ensure success. First, finalize your UI wireframes to understand your exact graphical requirements. Next, rigorously validate your memory footprint on prototype boards. Finally, initiate a technical dialogue with your chosen display manufacturer early. You must lock in the controller IC and physical dimensions before finalizing the host PCB design.
A: Garbled rendering usually stems from incorrect byte orientation during the hex array conversion. If your tool exports horizontal bytes but your display expects vertical addressing, the image scrambles. Mismatches between the data array dimensions and physical display bounds also cause this issue.
A: Generally, no. Most host microcontrollers lack dedicated hardware JPEG decoders. They also lack sufficient RAM to run software decoding libraries effectively. Uncompressed 24-bit BMPs or raw C-language hex arrays serve as the reliable standard fallback.
A: Large data arrays quickly consume dynamic memory (SRAM), causing instant system crashes. You must explicitly instruct the compiler to write the array to flash memory. Use specific memory specifiers like `PROGMEM` or `const`, depending on your compiler environment.


